Goa is abuzz with excitement as vintage bike and car owners, users, collectors and fans are decking […]
Old is Gold
October 4, 2016
An idea which can change the dismal story of today’s healthcare…the message going out today is let food be your medicine and medicine your food. But your food must be organic, nutritious and
By Pankajbala R Patel
The Consumers Association of Penang in Malaysia has for years been bringing out some very useful series of publications to educate, inform and teach readers and the lay public how to reap the genuine good life for themselves and their family and friends! Amongst the very useful booklets “Home Nutrition Garden” which is full of timeless insight into why we should put in our mouth food which nourishes and blesses Mother Earth.
In his Preface CAP President SM Mohamed Idris observes, “Home gardening has been part of our tradition. Two or three decades ago each and every house was adorned with vegetable gardens. Fresh vegetables were used in cooking. Needless to say, these vegetables were healthy and abundant with nutrition.” But gone are those days of old and sighs Mohamed Idris, planting, gardening, farming have become unfamiliar to the younger generation.
But perhaps the times have a turn for the better anew! We, the consumers, are daily becoming conscious that the fresh produce which reaches our tables from the world over is not food but mostly hype and bad food with chemicals in the form of fertilizers, pesticides and herbicides and much more…we see vegetables which are usually sprayed, dipped, drenched and coated with chemicals so that they look more beautiful and enjoy a longer shelf life.
Pertinently, Idris points out, “If we start growing our own vegetables, we could relish pesticide free healthy vegetables. Not only those with houses with land, but apartment dwellers too can grow vegetables provided that they equip themselves with some basic information on planting and farming.” Hence, we take pleasure in reproducing some interesting step-by-step information and illustration to get you going on becoming self-sufficient at least when it comes to vegetables and fruit!
The booklet is such a fund of useful information that we take the liberty of offering it here for those who have a yen to start their own “home nutrition garden” for health and happiness. Make sure you use no chemical fertilizers and pesticides to eat you own nutritious and full of life-giving health in your efforts to grow an honest garden of food!
Excerpted from `Home Nutrition Garden’ published by the Consumers Association of Penang, Malaysia
WHY DO WE NEED HOME NUTRITION GARDEN?
Do you need training to set your own home garden?
In home garden, prime attention should be given to soil health. Compost materials leaves, grass) help in soil fertility. Organic matter input is vital for the growth of healthy vegetables. When the soil is healthy, plant disease and pest attacks are under control.
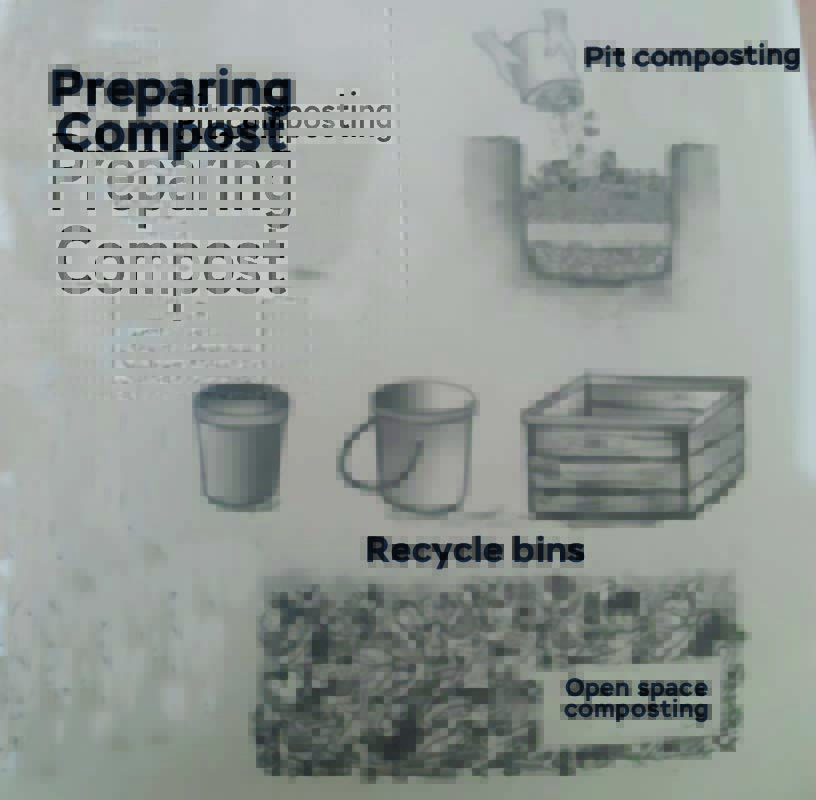
Various methods can be applied in compost preparation:
Dig a pit and dump organic waste into it.
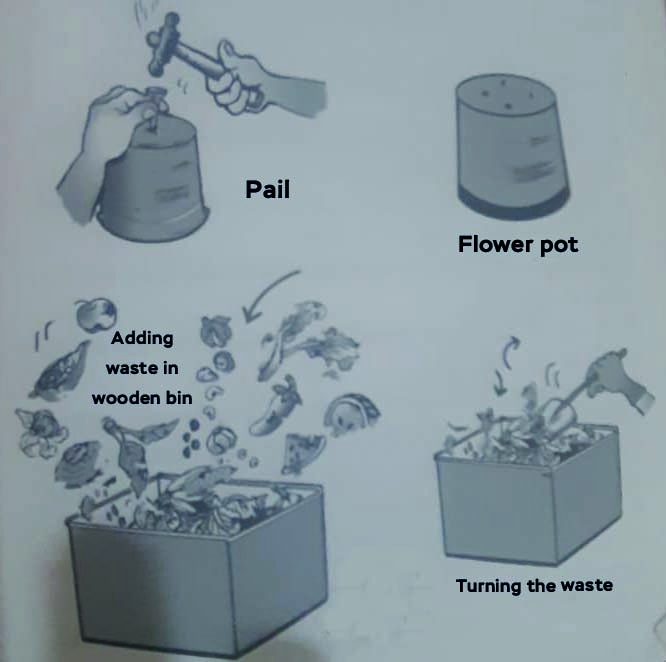
Use unwanted bins and collect the waste to compost.
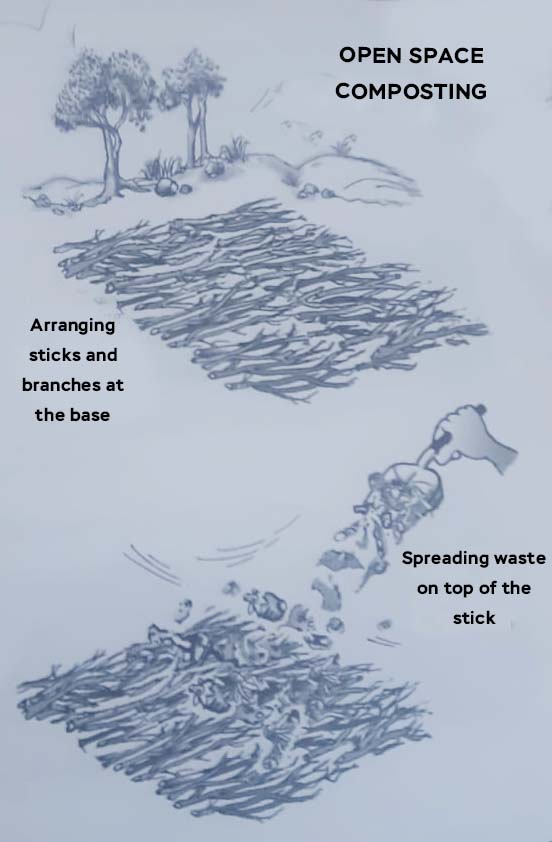
Composting can also be done in open space above ground.
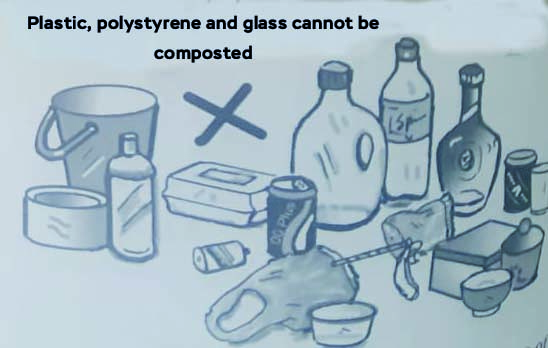
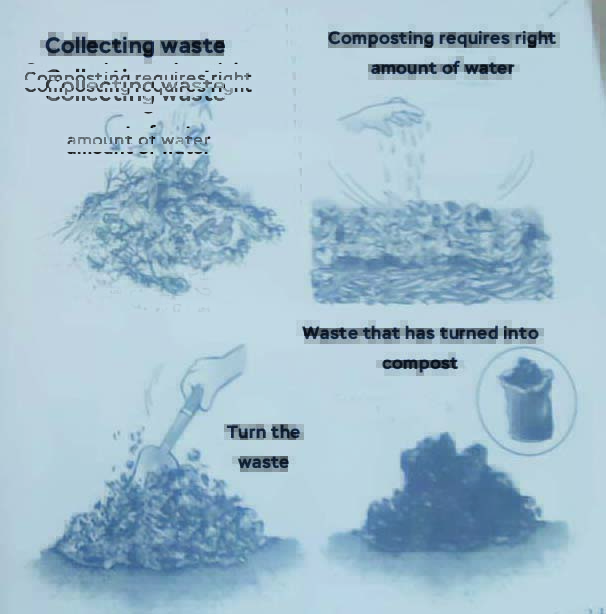
Points to notice when composting
Pit composting

Composting in a bin
Open space composting
Growth promoters preparation methods
Apart from composting, we can prepare simple growth promoters for our plants. Do not use metal container in this preparation. Preparation methods are as follows:-
Fish Amino Acid
Fish waste 2 handful
Molasses or brown sugar 2 handful
Mix fish waste and molasses together in a container. Cover the mouth of the container with cotton cloth. Stir this mixture once a day. Use wooden spoon or stick to mix. After stirring, cover it again with cotton cloth. If you feel it inconvenient to open and close the pot every day, just lift the pot and swirl it well in both directions (clockwise and anti-clockwise) about five times in each direction and leave. Keep stirring or swirling every day. On the 10th day a thick liquid will be formed. Strain this liquid and keep it in a bottle. Once tablespoon of this liquid should be mixed with 1 litre of water and sprayed to your plant. (Preferably use hand sprayer). This liquid can be stored for six months. Fish amino acid can be sprayed to plant twice a week.
Coconut lassie for flowering
Coconut milk 100ml
Lassie 250ml
Water 150ml
Mix coconut milk, lassie and water together in a container. Close the container with cotton cloth. Stir this mixture once a day. Kep this mixture fo 15 days. On the 16th day coconut lassie is ready. Tis mixture can be used for 3months. Add 10 times more water to the amount of coconut lassie and spray to plants. It helps in flowering of the plants.
To prepare lassie put curd (homemade yogurt is called curd) in the blender and stir two or three times. Remove the butter that surfaces. The remaining liquid without butter is lassie.
Farmers EM
Pumpkin 1 slice
Papaya 1 slice
Banana 2
Molasses 200 gram
Egg 1
Water 2 litres
Take 200grams each of the above mentioned fruit. Cut the fruits into small pieces, put in a container and add 2 litres of water. Break an egg into this and stir thoroughly. Put this blended mixture into an airtight container. On the 10th day, strain the solution. Add 3 tablespoons of FEM into 2 litres of water, stir and pour on the soil. This solution can also be sprayed to the plants. It develops good microorganisms in the soil. The residue after straining can be added into compost bin or to the soil.
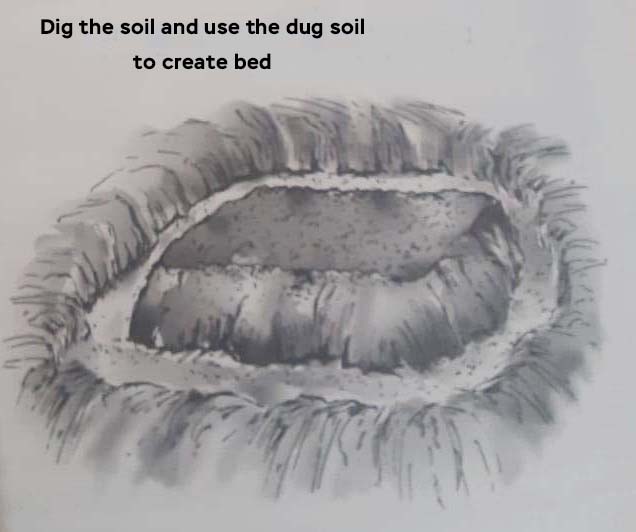
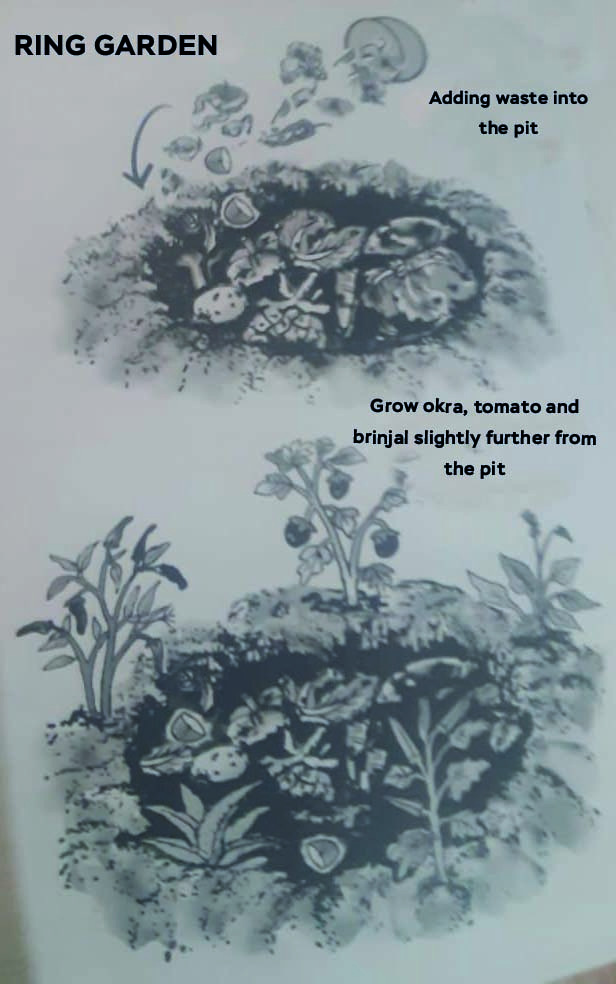
b) Ring garden
* Mark the soil up to 3 feet diameter and dig the soil in a round shape.
* The depth should be from 1 to one and half feet in the centre and should taper towards the sides like a frying pot.
* Place the dug soil around the periphery of the pit.
* Put kitchen waste in the pit. If cow dung is available add that too in the pit. Sprinkle water in the waste. See pictures)
* Keep repeating this for the next 15 days.
c) Double digging garden
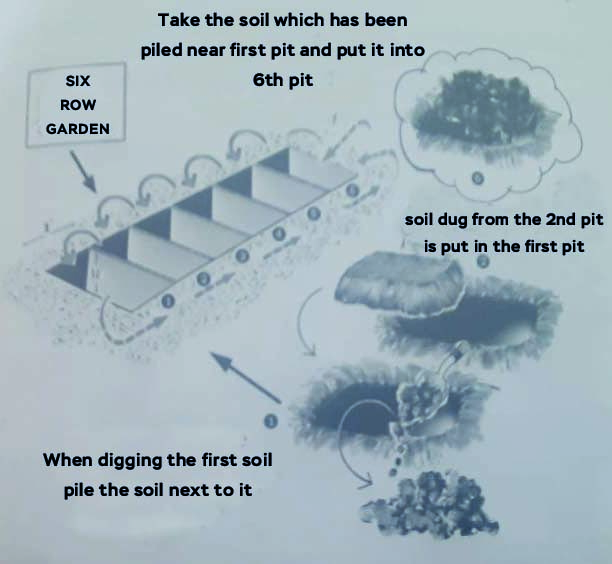
* Select an area 6×4 feet.
* Mark a number for every one foot from 1 to 6. For every one foot leave some space about 3 to 4 inches.
* At the spot marked No 1, dig the soil up to 1 foot depth and pile the soil next to the pit. Then dig the same pit for another 1 foot to loosen the soil. Do not remove this soil, just loosen it.
* Dig the soil at the spot marked No 2 up to 1 foot depth. Put the sol dug from the 2nd pit into the first pit. Then dig the same soil for another 1 foot to loosen it.
* Do the same for spots market No 3, 4 and 5. When digging spot marked No. 6, take the soil which has been piled near pit No.1 and put it into pit No. 6.
* Mix compost in each pit and grow vegetables of your preference.
d) Apartment garden
* Pot – vegetables can be grown in pots. Choose pots which are not heavy. You can hang some of the pots in your balcony and place some on the floor depending on the size of your balcony. Make sure the location you place the pot get enough sunlight.
* Recycle containers – plants can also be grown on recyclable water bottle, biscuit tins and gunny sack. Except for gunny sack, for other containers make a hole at the bottom of the containers. Since gunnysack has tiny holes, there is no need to make holes. When containers are ready, mix garden soil with compost and plant the vegetables.
e) Pipe plants
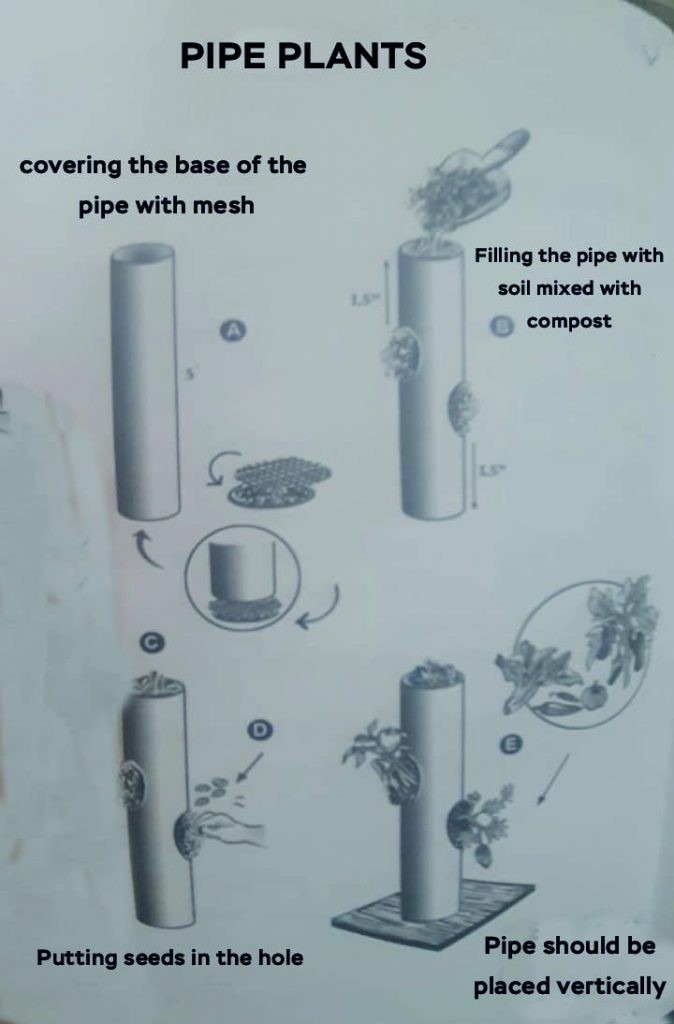
* Select a pipe about 4 to 5 feet length. The mouth of the pipe should be from 3 to 5 inches in diameter.
* If the base of the pipe is closed, then make a hole. If it is opened, cover the base with mesh to prevent the soil from dropping.
* Fill the pipe with garden soil mixed with compost.
* Fill the pipe with garden soil mixed with compost.
* Make a hole on both side of the pipe for every one and half feet as shown in the picture. The diameter of the hole should be less than three quarter inch. Place a seed in this hole. It is enough to put one seed in each hole.
* Place the pipe vertically.
* Apply compost and water the plant in the opening of the pipe.
* Grow vegetables like brinjal, tomato and okra in pipes with the width of 4 to 5 inches in diameter.
f) Hanging plants
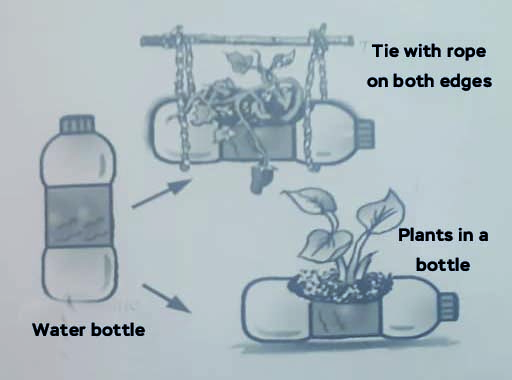
* Cut the centre part of the water bottle as shown in the picture. Add garden soil with compost and grow your vegetables. Plant vegetables with small roots like coriander, mint and pennywort.
* Tie edges of the bottle with a string and hang it.
* Pipes too can be used for this purpose.
Seeds we use may be attacked by fungus, bacteria or virus. Plants grown with these seeds are susceptible to diseases. Treating the seed is important to avoid this. Soak the seeds in neem leaf solution or acorus solution or cow’s urine, 20 minutes before sowing.
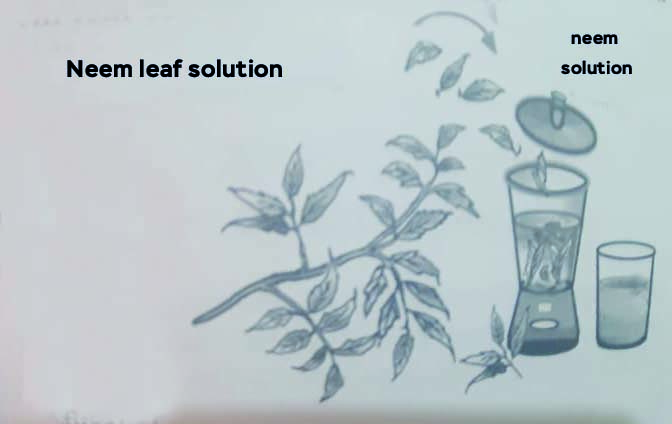
Neem leaf solution
Crush or blend the neem leaf and squeeze 50 ml of juice. Add 100ml of water in this juice, mix well and soak the seeds for 20 minutes before planting.
Acorus solution
Soak 50 grams of acorus n 100ml of water overnight. The next day remove acorus from the ater. Soak the seeds in this water for 20 minutes before planting.
Cow’s urine
If cow’s urine is available, mix 50 ml of cow’s urine in 100n ml of water an soak the seeds in this solution before planting.
Okra
Radish
Brinjal (egg plant)
Chilli
Kangkung
Amaranth
Kailan
Mint
Pennywort
Spring onion
(Box at begging of page somewhere)
(QUOTE)
“When it is understood that one loses joy and happiness in the attempt to possess them, the essence of natural farming will be realized. The ultimate goal of farming is not the growing of crops, but the cultivation and perfection of human beings.”–Masanobu Fukuoka, The One-Straw Revolution
 LETTER TO THE EDITOR FOR THE ISSUE DATED JULY 04, 2026
 BATTLE WON BUT WAR REMAINS!
 BITCOIN FOR BEGINNERS! By Arvind Pinto
 POLYMER NOTES, CLEANER CASH, NOT CURE-ALL!By Satish Singh
 WHEN IT COMES TO BIRTHDAY CAKES I STILL WANT TO ORDER `BOL SANS RIVAL’…By Tara Narayan
 GOA’S 56-VILLAGE U-TURN EXPOSES DEEPER CRISIS OF TRUST! By Dr Olav & Deborah Albuquerque
 DEV BOREM KORUM… FOR SHARING MY JOURNEY OF 43 YEARS IN GOA!
 FROM SOMNATH’S PLUNDER TO ‘CHANDA CHORI’ IN AYODHYA!By Ram Puniyani
 A SPOONFUL OF CAUTION: THE HIDDEN STORY BEHIND THE COMMON COUGH SYRUP! By Dr Amit Dias, MD
 WEEKEND UPDATESLETTER TO THE EDITOR FOR THE ISSUE DATED JUNE 27, 2026
 ROMI KONKANI IS FLOURISHING: Nagri Konkani is sinking!
 SCALPEL & SCAM: HOW INDIA’S HEALTHCARE CRISIS IS FUELLED BY GREED, GRAFT & GOVERNMENT APATHY! By Uday Barad
 INDIA’S GIG ECONOMY: GOA’S FLEXIBLE FUTURE OR FRAGILE REALITY? By Arvind Pinto
 COME THE MONSOON SEASON AND EVERYONE WANTS TO FEAST ON FRYUMS!By Tara Narayan
Goa is abuzz with excitement as vintage bike and car owners, users, collectors and fans are decking […]